Live Traffic Feed

Thursday, August 25, 2016

Merging Options available in Excel


From above screen there are multiple options available for Merging the excel cell.
Merge & Center - This option allows you to Merge the multiple                                     cells and keep the contents in the center of the                                   cell.


Merge A1 and B1 


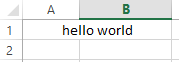
Merge Across     - Merge the selected cells in to larger cells while                                 keeping rows separate.

Merge Cells        - Merges selected cell into one cell but does not                                   align the text to the center.

Unmerge Cells   - Unmerge the cells means which allows you                                         reverse the smaller cells from the bigger cell.
How to Merge the Cells in excel?

In excel there is a wonderful option where it actually merges the cells. This option is useful when you want to create a Column heading and under which there are multiple sub headings.

Lets see the below explanation how to works.

We want to select excel cells "A1" , "B1" and "C1" as single cell which is used for main heading under which "A2", "B2" and "C2" are sub headings of the Column then we need to do as below.

Select "A1" , "B1" and "C1" and choose the option in red box below "Merge and Center". This option allows you to Merge the multiple sequential cells as a single cell.


When you enter the content in the cell "A1" and select the cells "A1", "B1" and "C1" and click on the option "Merge & Center" then it will automatically align the contents to the center. Now you can see the Column heading is big and under which you can create Sub headings as shown in above screen shot.

Merging options available in System:


Thursday, August 18, 2016

How to fit the text in narrow Columns of Excel or how to change the Orientation of the text?

Suppose the text in excel cell is big and you don't want to increase Column width and want to show the labels vertically or diagnolly?

The below are different options available for changing the Orientation of text in an excel cell.

Angle Counterclockwise
Angle Clockwise
Vertical Text
Rotate Text Up
Rotate Text Down
Format Cell Alignment

To change the orientation of excel cell you need to select the excel cell of text and select the option of orientation.

By default if the text length exceeds Column width then the text overlaps with next Column and it looks as below.


Suppose you choose the option of "Angle Counterclockwise" option and the display of text in excel cell is as below in counterclockwise direction.


If you choose the option of "Angle Clockwise" 


If you choose the option of  "Vertical Text" 


If you choose the option of  "Rotate Text Up" 


If you choose the option of  "Rotate Text Down" 


The last option of  "Format Cell Alignment" take you through the below screen. In the below screen you only worry about Orientation for now. Going forward we can learn other options in the below screen.

For Orientation you can choose Positive or Negative angle based on the direction of text you want to fit the text in excel cell.

The Up and Down arrows in below Increase the angle and decrease the angle. Other way is click on text direction pointer below and drag Up or Down based on increase or decrease of angle.


Text direction can be "Right-to-Left" or "Left-to-Right" based on your choice.


How to fill the Color of a excel cell and changing the Color of text

If you want to fill the Color of excel cells for better readability and look then you might be using different Colors to differentiate the content in your excel.

For example, you can fill the headings of excel cell to a different Color.

To Fill the Excel cell with Color you need to use below option.


You may choose any Color with the list available or you can go to "More Colors" in the above screen shot and select "Standard Colors" given by default or "Custom Colors" as below.


In the above screen you can pick any Color by single click on Color and if you want to change the shade of the Color you can move the arrow Up and Down as required.

When you change the Color and Shade you may observe below RGB (Red, Green, Blue) values gets changed or else if you already know the RGB values you can enter those values directly in the fields so that it will automatically pick your known Color.

There is another Color model HSL (Hue, Saturation, Luminous) and based on HSL values Color will change accordingly.


You also have an option to remove the Color fill of the excel cell with the below option "No Fill"


Changing the Color of text in Excel

Default Color of the text we write in excel is black. If we wish to change the Color of the text there is an option below screenshot.

First Select the cell that you wish to change the Color and Choose the Color you want to change.


For instance if you wish to change the only part of the text in excel cell to red and other part of the text to green that is also possible.

For example,

"Hello World" below i want to change Hello in "Red" and World in "Green" then below is how we should do.

Double click on "Hello World" cell below and select only "Hello" with pressing mouse cursor and then select the Color "Red"


Similarly, Select the text only "World" and apply Color green.


Finally, it looks as below..


Wednesday, August 17, 2016

How to align the text in a excel cell

Excel cell text can be aligned 


  1. Vertically (top align, middle align, bottom align)
  2. Horizontally(left align, center align,right align)


Top Aligned - Vertically

From below the text "hello" is aligned to top vertically in the excel cell.


Middle Aligned

From below the text "hello" is aligned to middle vertically in the excel cell.


Bottom Aligned

From below the text "hello" is aligned to bottom vertically in the excel cell.


Left and Middle Aligned 

From below the text "hello" is aligned to left (horizontally) and middle(vertically) in the excel cell.


Center and Middle Aligned 

From below the text "hello" is aligned to Center (horizontally) and middle(vertically) in the excel cell.


Right and Middle Aligned 

From below the text "hello" is aligned to Right(horizontally) and middle(vertically) in the excel cell.


Tuesday, August 16, 2016

How to Bold, Italic and Underline the text in Excel

Suppose below are the different texts before we actually apply properties of Bold, Italic and underline text.


To apply property of the text select the cell that you want to apply and click on icon "B" "I" "U" to apply Bold or Italic or Underline respectively.


After applying Bold, Italic and Underline of texts it looks as below.


Can we apply different property of text of a excel cell? Means part of cell text is bold, some part is Italic and some part is underlined?

Yes, Its possible.


Suppose if we want to apply Bold property to "bold" text and Italic Property to "italic" text and Underline property to "underline" text then double click on the cell and select only "bold" text below and click on "B" Icon. 


Similarly, select only "Italic" text and select "I" icon.
select only "underline" and select "U" icon above.

Output looks as below.


What is the use or Purpose of format painter in Excel

When you format the text and do the modifications to font, size and color of the text in excel then you need to apply font, size and color separately.

In simple if you like the look of a content then you can apply the same look content in other places of the document.

For example,

I want to have "Arial" text with Size = 12 and green colored text in various places of my document.


In the above example "Student" text with font = "Arial" , Size = 12 and color green and you want to apply the same look to "Format Painter sample text" in the cell B7 then click on "B2" Cell and click on Format painter icon with brush symbol.


Apply the same look at B7 Cell - "Format Painter sample text"


Then the text appears as below.